I've been succesfully avoiding studying for my test tomorrow by working on my scrapbook binder - the organization of its contents was getting a little bit out of hand. For anyone who scrapbooks, I recommend having a scrapbook binder. Why? Do you ever buy a scrapbook magazine from the bookstore and find a great idea you want to try later? So you cut it out and put it on your desk and a few months later, you want to try that layout or technique but your piece of paper is gone? (everyone say "yes" together, unless you are really good at remembering where you put stuff).
So I'm going to walk you through the steps I took to create my scrapbook binder so that you can make your own. The same concept works for crafters as well, but you may need some different categories. Do keep in mind, I'm not exactly and extreme scrapper: I don't have many of the tools, machines, embellishments, and software that "awesome scrapbookers" have today (money doesn't grow on trees or flowers or anywhere really) so I do the best with what I have. So for those of you who like to keep things fairly simple, this may be a good binder for you:)
Step 1: Find a 3 ring biner and some page protectors to put inside that binder. I recommend a binder instead of a book because that way you can add pages to a certain section when you run out of space. It's also a good idea to use page protectors so that holes in your paper don't get worn down from page turning and as a result, the paper falls out.
Step 2: Think of some categories or sections that would work well in your binder. These can vary greatly from person to person. For example, if you have kids and you mostly scrap about them, you may want a section for each child. Or, if you like scrapping holidays, you can make sections for each of the major holidays of the year - it just depends on your preference. Here is a list of the sections I have in my binder currently:
- Cards and Paper Projects- Many times you will see small projects in scrapbooking magainzes that aren't necessarily for scrapbook pages. For example: "How to make stamped giftwrap." This is a good place for the things that don't really belong elsewhere in your binder.
 Embellishments: I often put pictures of small details for pages that I like here such as ribbon flowers. They don't so much involved how to make the item, but more the idea that I like the feature/embellishment as a whole.
- Layout Sketches: Now if you are like me and go crazy over layouts, you may need an entirely seperate binder for layouts. I have a seperate book that I paste layouts into and then I number that pages at the bottom for reference. Back to the binder, I find it helpful to have a section just for YOUR personal layout sketches. I utilize this section by going through my photos, finding a layout or idea that I like, and then drawing the specific layout for those photos in this section. That way I won't lose my ideas. Once that page is complete, I can cross out or remove the sketches from that section. So this part of the binder never gets too full.

Lettering: There are some many cool ways to decorate letters and since Title inspiration is different from embellishment inspiration, it gets its own section. Plus for those of us who don't do digital scrapping or have photoshop or even a diecut machine (yep me) having font ideas from magazines and some printed out fonts are great to have.
One Time Use- This is a category I kind of made up myself or at least I have never seen it before. Sometimes I see something in a magazine that is just AWESOME but I would never use it twice since it would be pretty obvious and boring if I did. A few days ago I found an large owl embellishment for a layout that I would love to replicate sometime. But once I use it, the picture will be crossed off.
Organization: Love looking at those freakishly organized scrapbook rooms? Wanna trying a couple things out for organizing paper you saw in a magazine or online? Put it in this section!
Photography: Photos are a very important part of our layouts. Not only are we scrappers, but photographers as well. Sometimes a good picture can make all the difference in a layout. Even changing the colors or background make a photo unique. So get to know some photo editing software and get to know your camera and paste all those tips here.
Techniques: Techniques and embellishments sections can kind of overlap sometimes, but more so I find myself putting things here such as "how to tranfer images to fabric" or "how to distress paper." It's more of the manual part of the binder.
Another thing you may want to do that technically doesn't stay in your binder is make a template document. I have a Word document where I copy and paste template I find online for things like hearts, dogs, trees, etc. I don't recommend printing out templates because each page is different and you WILL want to resize images.
Step 3: Next you will want to make a page in Word for each section stating what the section is and maybe adding a picture to go with it. Print each one off and put into a page protector. When placing these in your binder, I find it easiest to put them in alphabetical order.
Step 4: This step isn't necessary but it is helpful. Take some page tabs and write your sections on each one. Attach to appropriate pages.
Step 5: Make a cover for your binder. Use whatever you like to show your personality. It's also helpful to label the edge of the binder so you can find it quickly on a shelf.
Step 6: THE BEST PART! It's time to dig through those magazines, cut out what you like, and tape/paste them onto sheets of regular printer paper. I also like writing next to the image just to clarify what I liked so much about it if there are many parts to the picture. Place the sheet inside of a page protector and place it behind the appropriate tab.
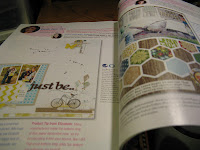
Sometimes I have almost as much fun searching for ideas as I do making the layouts (almost). It's a lot more fun especially when you know there is a place to store that information for future use in a place where you may actually use it!


 So I found some recipe's online for how to make your own chicken stock which seemed like a huge money saver. We bought a rotisserie chicken (I thought this would add more flavor to the broth) and enjoyed the meat itself. We still have some left in the fridge. We stripped the meat off the bones and put the bones in a large stew pot. I also added chunks of celery, potato, green onion, and regular onion, but you can use whatever vegetables you have on hand (except I would not recommend tomatoes, which are really fruit anyways). Pour enough water in the pot to at least cover the bird bones and the veggies.