divider bar

Showing posts with label Recipes. Show all posts

Saturday, May 4, 2013

Root Beer Float Cookies

 
I found this recipe for Root Beer Float Cookies at Six Sisters Stuff and they were delicious!  Mine didn't turn out as flat or as dark as the ones in the picture, but they stayed nice and soft.  The original recipe can be found here - I actually havled the cookie recipe and thirded the frosting recipe since I don't like to overload my cookies with frosting.

Cookie Ingredients:
1/2 cup butter, softened
1 cup packed brown sugar
1 egg
1/2 cup buttermilk
1/2 tsp. root beer extract or concentrate
2 cups flour
1/2 tsp. baking soda
1/2 tsp. salt

Frosting Ingredients:
1 1/3 cups powdered sugar (or icing sugar)
1/4 cup butter, softened
1 Tbsp. milk
1/2 to 1 tsp. root beer extract or concentrate
 
Directions:
Preheat oven to 375º.
In a mixing bowl, cream butter and brown sugar. Add egg an beat into mixture. Beat in buttermilk and root beer extract.
Combine dry ingredients; gradually add to creamed mixture.
Drop by tablespoonfuls onto ungreased baking sheets. Bake at 375º for 10 minutes or until lightly browned. Remove to wire racks to cool.
In a mixing bowl, combine all frosting ingredients. Beat until smooth.
Frost cooled cookies.
 
Makes 18-22 cookies.

Wednesday, April 3, 2013

Cheesy Potatoes

For holidays, we almost always had this cheesy potatoes recipe and I definitely didn't mind eating the leftovers!  Thanks Mom for sending me the recipe to use for Easter :)

2 lb. frozen hashbrowns (If you use a 24 oz bag instead, use a little less sour cream)

1 tsp. salt

1/2 tsp. pepper

2 T. dried minced onion

1 can cream of chicken soup

1 pt. sour cream

2 c. American cheese, grated

milk


Preheat oven to 300 degrees.  Thaw potatoes before mixing. Add milk until it reaches desired consistency (I used about 1/4 cup to make them creamier). Mix all of the above ingredients and put into a buttered 9 x 13 pan.  Place pan in the oven and bake for about 60-70 minutes, stirring every 15 minutes (since the sides cook faster).

Wednesday, March 20, 2013

Seasoned Red Potatoes

Since it's spring break for me, I've been home catching up on scrapbooking, organizing, and doing some cooking!  Yesterday I tried this new and very simple recipe which turned out great.  The only trouble I had was that my bag of red potatoes contained HUGE potatoes so I had to cook them a while longer than the recipe said, but it worked out fine.

Original Recipe from Taste of Home


Seasoned Red Potatoes

Ingredients:
12 to 14 small red potatoes (or 9-10 larger red potatoes)
1/4 cup olive oil
1/4 cup butter, melted
1 tsp. salt
1 tsp. garlic powder
1 tsp. dried basil
1/2 tsp. dried thyme
1/2 teaspoon pepper

Peel a strip from around each potato.  Place potatoes in an ungreased 3 quart baking dish.  In a small bowl, combine the oil, butter, and seasonings; drizzle over potatoes.  Bake uncovered at 350 degrees for 50-55 minutes (or 65-75 minutes for larger potatoes) or until tender, stirring every 15 minutes.  Yield: 6 servings


Wednesday, March 6, 2013

Slow Cooker Creamy Ranch Pork Chops and Potatoes

Image courtesy of SixSistersStuff.com
 
It's great to find a recipe that tastes great and takes little effort on my part.  You could say that I'm good at following directions, but recipes that take actual cooking skill like stirring it just right so that things get mixed but not overmixed or knowing if the meat is done without practically cutting it in half to look inside is kind of difficult for me.  When I found this recipe on sixsistersstuff.com, I was excited to try it since it involves a crockpot (love that thing).  There are even instructions on their website on how to make your own cream of chicken soup and your own ranch dressing mix (didn't have time to try it, maybe next time).  I actually halved this recipe since I only had 4 pork chops and 4 potatoes and it turned out great!


Slow Cooker Creamy Ranch Pork Chops and Potatoes

Ingredients:

4-6 pork chops
6-8 medium potatoes, chopped into large pieces
2 cans fat-free cream of chicken soup*
2 packages dry Ranch dressing mix*
1 cup milk
Dried parsley to sprinkle on top (optional)

Directions:
Spray your slow cooker with non-stick cooking spray and put potatoes on the bottom. Place the pork chops on top of the potatoes. Mix together the condensed soups, Ranch dressing mix and milk. Pour on top of the pork chops and cook on LOW for 6-7 hours or on HIGH for 4 hours.
Use the extra sauce in the slow cooker as a gravy for the potatoes and the pork chops. Sprinkle with dried parsley if you want.

Tuesday, March 5, 2013

Apple Braid

This afternoon I wanted to make apple crisp, but when I got to my fridge, I noticed I only had 3 Granny Smith apples instead of the needed five.  Pinterest, being my friend, gave me a solution to my problem - an Apple Braid!  It's super easy to make, bakes quick, and would be great for a holiday treat (or a March 5th treat, whenever really).  This recipe is from Rachel, a guest poster on eatliverun.com.  You can find the original recipe here.

Photo courtesy of eatliverun.com

Apple Braid
Makes 1 bread (approximately 12 servings)

For the Apple Filling
3 medium-size Granny Smith apples (I used 2 larger apples which worked great)
3 tablespoons granulated sugar
1 1/2 teaspoons cinnamon
2 teaspoons lemon juice

For the Bread
2 1/2 cups bread flour
1/4 cup granulated sugar
1 tablespoon instant yeast (I prefer SAF Instant Yeast)
3/4 teaspoon salt
1 cup warm water
2 1/4 teaspoons vegetable oil

For the Glaze:
1/3 cup confectioner’s sugar, sifted
5 teaspoons whipping cream
1/2 teaspoon vanilla extract
Pinch of kosher salt
Pinch of nutmeg
Preheat the oven to 350 degrees Fahrenheit.

Make the Apple Filling: Peel, core, and slice the apples into thin slices, then cut the slices in half. Toss the apple pieces with the sugar, cinnamon, and lemon juice. Bake the apple filling in an 8-inch square baking pan (or 9-inch pie tin) for 15 minutes. Remove from the oven and set aside. (Note: Do not turn the oven off at this point. You will be using it to bake the finished braid.)

Make the Bread: While the apple filling is baking, begin preparing the bread dough. Mix the dry ingredients together in a large mixing bowl. Add the water and oil and mix the dough for 6 minutes using an electric mixer on medium-high speed.

Spray a smooth clean surface with cooking spray and turn the dough out onto the surface. Knead the dough briefly to give it a smooth surface (this will only take several turns of the dough to accomplish). Spray a rolling pin with cooking spray and roll the dough out into a large rectangle, about 12-inches by 16-inches in size. Lift onto a greased baking sheet.
Using a pizza cutter or sharp knife, cut each side into strips about 1-inch wide down each side, leaving the center third of the dough uncut. Spread the apple filling down the middle third of the dough. Fold strips of dough into the center, crisscrossing the filling by alternating strips from each side. Lightly press ends to seal, and straighten out the braid with your hands, if necessary, to straighten.

Image courtesy of eatliverun.com


Bake the braid in the oven for 25 minutes, or until golden brown. Remove from the oven and let the braid cool for several minutes.

Make the Glaze: Whisk together the glaze ingredients in a small bowl until blended and smooth.

Brush the glaze in a thick coat over the entire surface of the apple braid while it is still cooling. Carefully transfer the braid to a cooling rack set on a baking sheet (to catch drips) to finish cooling and prevent the bottom of the braid from becoming soggy from sitting in any pooling glaze. Slice and serve.


Unfortunately our oven is very small and since our biggest cookie sheet that can fit in there is smaller than this bread is supposed to be, I had to downside the bread a bit.  But it STILL turned out amazing!  Let me know if any of you try this recipe out :)


Thursday, February 21, 2013

Butterbeer Cupckaes

I've been anxiously waiting to try this recipe for about a week now, and yesterday since I didn't have school I decided to give it a try.  Talk about delicious!  If you are a Harry Potter fan and love butterscotch flavor, these are a must make!  The original recipe came from Erica at Erica's Sweet Tooth.  Be sure to check out her other recipes while you are there, she has some great stuff!  I made a few alterations to the recipe which will be marked in red below.

 
(Image by Erica at Erica's Sweet Tooth)
Butterbeer Cupcakes

Cupcakes:

-2 cups flour (I used cake flour, in which case you add two more Tablespoons, in order to get fluffier cupckaes based on the comments)
-1 1/2 tsp baking powder
- 1/2 tsp baking soda
-1/4 tsp salt
-1/2 cup unsalted butter, at room temperature
-1/2 cup sugar
-1/2 cup dark brown sugar
-3 eggs
-1 1/2 tsp vanilla
-1 tsp butter flavoring
-1/2 cup buttermilk
- 1/2 cup cream soda

Butterscotch ganache:

-11oz butterscotch chips
-3/4 cup heavy cream

(You could probably 1/2 the ganache recipe depending on how full you like the cupcakes but we had a TON leftover)

Frosting:

-1/2 cup unsalted butter at room temperature
-1/3 cup of butterscotch ganache
-1 tsp vanilla
-1 tsp butter flavoring
-1/8 tsp salt
-1 lb of powdered sugar
-splash of cream as needed

(I found that this was more frosting that we needed and we even piled the frosting high like in the picture so if you like less frosting, cut this in half.  I also thought that this was a very sugary and heavy frosting.  If you like whipped frosting, I would recommend this frosting recipe instead:

1 box sugar free butterscotch pudding mix
1 8oz container of Cool Whip
1 cup of milk

Combine pudding mix and milk in a large bowl.  Fold in cool whip.)

1. Preheat your oven to 350 degrees Farenheit and put liners in the pan.
2.  In a large bowl, mix together flour, baking powder, baking soda, and salt.
3.  In another bowl, use an electic mixer to cream together the sugars and butter until light and fluffy, 2-3 minutes.
4. Beat in the eggs one at a time, while scrapin the sides of the bowl.
5. Add vanilla and butter flavoring.
6. Combine buttermilk and cream soda in a small bowl.
7. Alternate adding the buttermilk mixture and the flour mixture to the egg mixture and mix together well.
8.  Fill the liners 3/4 full and bake for 16-17 minutes.  Cool completely on wire racks.

9. For the ganache, melt the chocolate chips and heavy cream in a double boiler until smooth.  Allow to cool.
10.  Fill a squeeze bottle some kind of filling device with the ganache and squeeze about 1-2 teaspoons of ganache into the cupcake.

11.  For the (buttercream) frosting, cream the butter in a bowl using an electric mixer.
12.  Add vanilla, ganache, butter flavoring, and salt and mix well.
13.  Beat in powdered sugar for about 2 minutes.
14.  Add cream a little at a time until you reach a desired consistency.

15.  Pipe or spread frosting on top of cupcakes.
16.  Sprinkle leftover ganache on top of the frosting.


These would go well with some chocolate frogs and Bertie Bott's Every Flavor Beans :)

Wednesday, February 6, 2013

Honey Muffins

I've made these muffins a few times now and they always turn out great.  Just the perfect touch of sweetness!

Honey Muffins

Grandma's Honey Muffins Recipe

2 cups all purpose flour
1/2 cup sugar
3 tsp. baking powder
1/2 tsp salt
1 egg
1 cup milk
1/4 cup butter, melted
1/4 cup honey

In a large bowl, combine the flour, sugar, baking powder, and salt.  In another bowl whisk the egg, milk, butter, and honey together.  Stir wet ingredients into dry ingredients.  Fill paper lined or greased muffin cups 3/4 full.  Bake at 400 degrees F for 15-18 minutes.  Serve warm.

This recipe came from tasteofhome.com

Wednesday, October 24, 2012

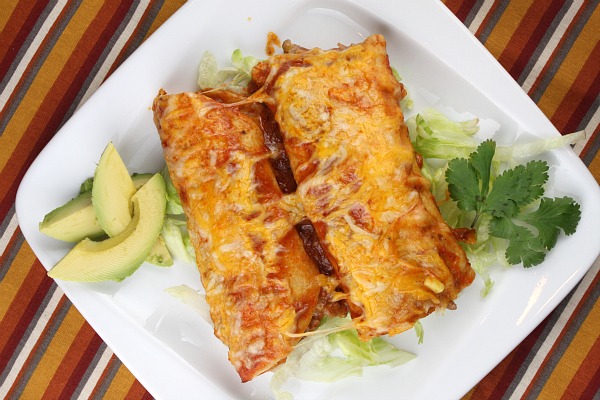
Zucchini Beef Enchiladas


I admit, I've never made echiladas before yesterday.  And, I don't think we had them at home when I was younger as far as I can remember.  So when I wanted to make this recipe, I was like "How do I know what they are supposed to taste like"?  Even so, I think they turned out great despite the fact that I used the large tortillas instead of the smaller ones which kinda threw off the whole "Makes 12 enchiladas" statement :)  Thanks to Lori at recipegirl.com for the great recipe!

                              Zucchini Beef Echiladas or Easy Beef Enchiladas 


Ingredients:

1 pound lean ground beef
1 1/2 cups diced onion
1 1/2 cups (about 2 medium) finely diced zucchini
12 corn tortillas, heated or fried in oil to soften
2 1/2 cups enchilada sauce, canned or homemade
3 cups cheddar- jack shredded cheese (2 works as well if you put less on top)
Serve as desired with: shredded lettuce, avocado, cilantro, sour cream

Directions:


1. Preheat oven to 350 degrees F. Spray a 9x13-inch pan with nonstick spray.
2. Heat oil in a large skillet. Add ground beef; break apart with a spoon or spatula to crumble the meat. Saute the meat on medium heat until browned (about 5 minutes). Tilt the pan and spoon the fat out of the pan; discard. Remove cooked meat to a bowl.
3. Return pan to medium heat and add onion and zucchini. Saute until just softened, 3 to 4 minutes. Remove the vegetables from the pan and add to the meat mixture; set aside.
4. Add 1/2 cup of sauce to the prepared baking pan. Spread it around so it coats the entire bottom of the pan.
5. Assemble the enchiladas: Place tortilla on a work surface. Spoon 1/4 to 1/3 cup of the meat mixture down the middle. Sprinkle 2 Tablespoons of cheese on top of the meat. Drizzle 1 Tablespoon of sauce on top. Wrap the tortilla around the filling tightly and place it seam-side-down in the pan. Repeat with remaining tortillas and filling until you have finished filling 12 tortillas. Place the tortillas side-by-side in the pan- it's okay if they are all snuggled in there tightly.
6. Pour remaining enchilada sauce over the top of the stuffed enchiladas. Cover the dish with foil and bake for 30 minutes.
7. Remove pan from the oven and take off the foil. Sprinkle remaining cheese on top; return to the oven and let the cheese melt (about 5 minutes).
8. Serve immediately with desired condiments.


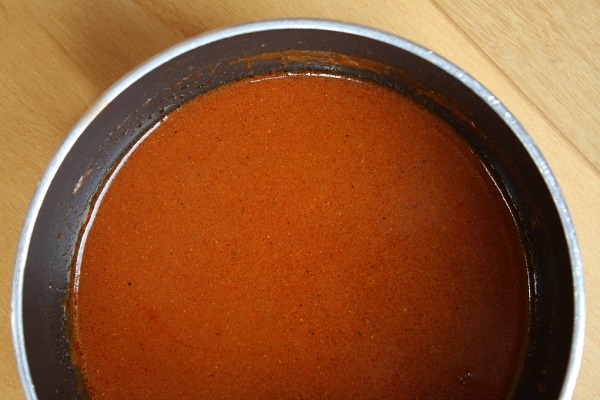
Homemade Enchilada Sauce

1/4 cup vegetable or canola oil
2 Tablespoons all-purpose flour
2 Tablespoons chili powder
1 (8 ounce) can tomato sauce
1 1/2 cups low-sodium chicken broth
1/2 teaspoon ground cumin
1/2 teaspoon garlic powder
1/2 teaspoon onion salt
1/4 teaspoon salt

Directions:

1. Heat oil in a large skillet to medium heat. Whisk in flour and chili powder. Reduce heat to medium and continue to whisk until lightly browned. Gradually whisk in tomato sauce, chicken broth, cumin, garlic powder, onion salt and salt. Stir until smooth, and continue simmering over medium heat about 10 minutes, or until slightly thickened.
2. Serve immediately, or keep in a covered bowl in the refrigerator for up to 3 days.


** I didn't use ground cumin since I didn't have any and the sauce still turned out amazing.  Since I don't really like spicy foods, I may just leave this out anyways.

Enjoy :)


Sunday, October 21, 2012

Try Something New: Homemade Chicken Broth


Now that it is fall, I love looking at soup recipe's on Pinterest.  Many times they call for chicken broth, of course.  I was finding it frustrating to have to buy those 32 oz. boxes of broth and only part of it and by the time I wanted to make another soup, I didn't have enough left!  Plus, those boxes are like $2.50-$3 or some other ridiculous amount of change for basically water infused with chicken.  Right.

Homemade Chicken Broth - No more buying those expensive cans and boxes of broth:)So I found some recipe's online for how to make your own chicken stock which seemed like a huge money saver.  We bought a rotisserie chicken (I thought this would add more flavor to the broth) and enjoyed the meat itself.  We still have some left in the fridge.  We stripped the meat off the bones and put the bones in a large stew pot.  I also added chunks of celery, potato, green onion, and regular onion, but you can use whatever vegetables you have on hand (except I would not recommend tomatoes, which are really fruit anyways).  Pour enough water in the pot to at least cover the bird bones and the veggies.


The next part was tricky for me.  You are supposed to let it heat ont he stove for at least 4 hours, ideally more.  IT CAN'T BOIL for extended periods of time.  Unfortunately our flame almost goes out before the boiling actually stops so I had to add ice cubes once and a while and take the lid off of the pot for a while too.  In the end it worked out fine though.

Next I drained the broth (make sure there is a bowl under the strainer :) ) and put the broth in a big bowl and into the fridge.  Overnight, the fat rises to the top so you can skim it off the next day.  Now comes the cool part.  Instead of pouring into plastic bags to go in the freezer, take a muffin tin (standard size makes 1/2 cup) and pour the broth into the little sections.  Let it freeze overnight and then the next morning, flip the pan upside down and run hot water over it for aboutg 30 seconds.  They should pop right out.  Store the cubes in plastic bags and label it as "Chicken Broth 1/2 cup cubes."  I loved this idea because I can get exactly the amount of broth I need for the recipe and not waste any of it.  My pot made 3 quarts which is like 3 of those boxes you buy at the store.  And I'm pretty sure mine tastes better anways :)


Tada!


LinkWithin

Related Posts Plugin for WordPress, Blogger...