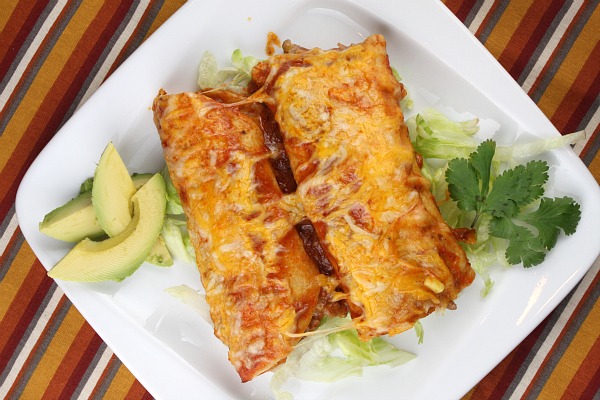
I admit, I've never made echiladas before yesterday. And, I don't think we had them at home when I was younger as far as I can remember. So when I wanted to make this recipe, I was like "How do I know what they are supposed to taste like"? Even so, I think they turned out great despite the fact that I used the large tortillas instead of the smaller ones which kinda threw off the whole "Makes 12 enchiladas" statement :) Thanks to Lori at recipegirl.com for the great recipe!
Zucchini Beef Echiladas or Easy Beef Enchiladas
Ingredients:
1 pound lean ground beef
1 1/2 cups diced onion
1 1/2 cups (about 2 medium) finely diced zucchini
12 corn tortillas, heated or fried in oil to soften
2 1/2 cups enchilada sauce, canned or homemade
3 cups cheddar- jack shredded cheese (2 works as well if you put less on top)
Serve as desired with: shredded lettuce, avocado, cilantro, sour cream
Directions:
1. Preheat oven to 350 degrees F. Spray a 9x13-inch pan with nonstick spray.
2. Heat oil in a large skillet. Add ground beef; break apart with a spoon or spatula to crumble the meat. Saute the meat on medium heat until browned (about 5 minutes). Tilt the pan and spoon the fat out of the pan; discard. Remove cooked meat to a bowl.
3. Return pan to medium heat and add onion and zucchini. Saute until just softened, 3 to 4 minutes. Remove the vegetables from the pan and add to the meat mixture; set aside.
4. Add 1/2 cup of sauce to the prepared baking pan. Spread it around so it coats the entire bottom of the pan.
5. Assemble the enchiladas: Place tortilla on a work surface. Spoon 1/4 to 1/3 cup of the meat mixture down the middle. Sprinkle 2 Tablespoons of cheese on top of the meat. Drizzle 1 Tablespoon of sauce on top. Wrap the tortilla around the filling tightly and place it seam-side-down in the pan. Repeat with remaining tortillas and filling until you have finished filling 12 tortillas. Place the tortillas side-by-side in the pan- it's okay if they are all snuggled in there tightly.
6. Pour remaining enchilada sauce over the top of the stuffed enchiladas. Cover the dish with foil and bake for 30 minutes.7. Remove pan from the oven and take off the foil. Sprinkle remaining cheese on top; return to the oven and let the cheese melt (about 5 minutes).
8. Serve immediately with desired condiments.
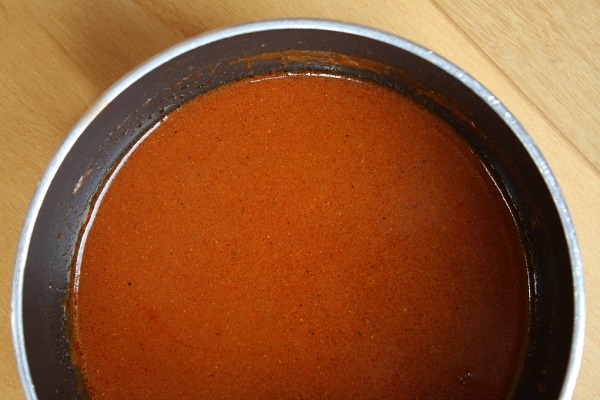
Homemade Enchilada Sauce
1/4 cup vegetable or canola oil
2 Tablespoons all-purpose flour
2 Tablespoons chili powder
1 (8 ounce) can tomato sauce
1 1/2 cups low-sodium chicken broth
1/2 teaspoon ground cumin
1/2 teaspoon garlic powder
1/2 teaspoon onion salt
1/4 teaspoon salt
2 Tablespoons all-purpose flour
2 Tablespoons chili powder
1 (8 ounce) can tomato sauce
1 1/2 cups low-sodium chicken broth
1/2 teaspoon ground cumin
1/2 teaspoon garlic powder
1/2 teaspoon onion salt
1/4 teaspoon salt
Directions:
1. Heat oil in a large skillet to medium heat. Whisk in flour and chili powder. Reduce heat to medium and continue to whisk until lightly browned. Gradually whisk in tomato sauce, chicken broth, cumin, garlic powder, onion salt and salt. Stir until smooth, and continue simmering over medium heat about 10 minutes, or until slightly thickened.
2. Serve immediately, or keep in a covered bowl in the refrigerator for up to 3 days.
2. Serve immediately, or keep in a covered bowl in the refrigerator for up to 3 days.
** I didn't use ground cumin since I didn't have any and the sauce still turned out amazing. Since I don't really like spicy foods, I may just leave this out anyways.
Enjoy :)


